A recent task presented to us by one of our customers requires icons to be added into a list view to demonstrate risk categories. The aim of this was to make the view more user friendly, and for high risk issues to stand out. This blog post will show you how it is done.
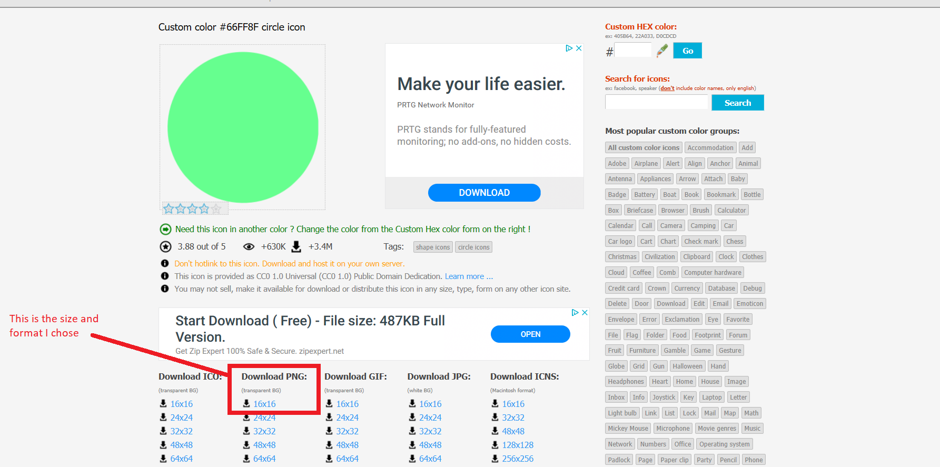
First things first, you need to get your icons. The example was done on a field called Risk Category and had fields ranging from “Very Low” to “Very High”. This meant 5 different icons were needed to cover the categories. For these icons you need 16x16 size and choose to download them in PNG format. There is a helpful website called https://www.iconsdb.com/. You can choose from a range of icon sizes and formats which is really useful in this instance.
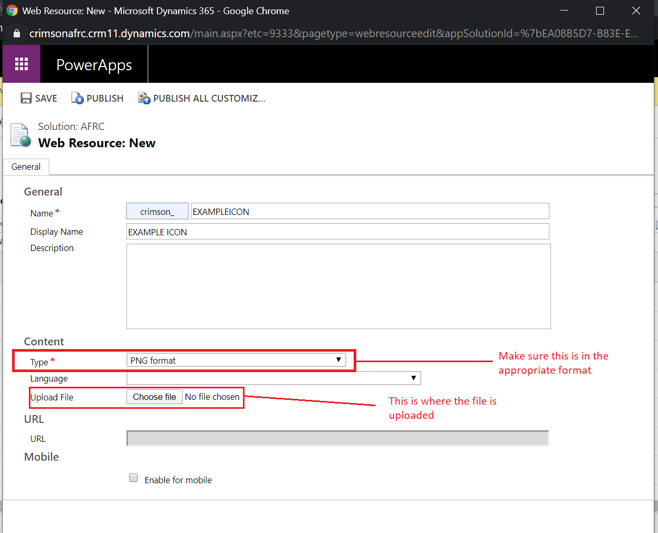
Once all the icons were saved into files, you can set about making them into a web resource. I’m sure many of you are already aware of how to do this, but for those who don’t this is how you do it.
First, start by entering a name for the icon (no spaces included), then adding a display name - making sure the type is in PNG format for the icon. Then upload the icon you have saved in your files, then save and publish. Your icon is now available to be used in the solution.
 Once you have done this for all the relevant icons, you need to create your option set. In the example, there are 5 different fields:
- “Very Low”
- “Low”
- “Medium”
- “High”
- “Very High”
As seen below:
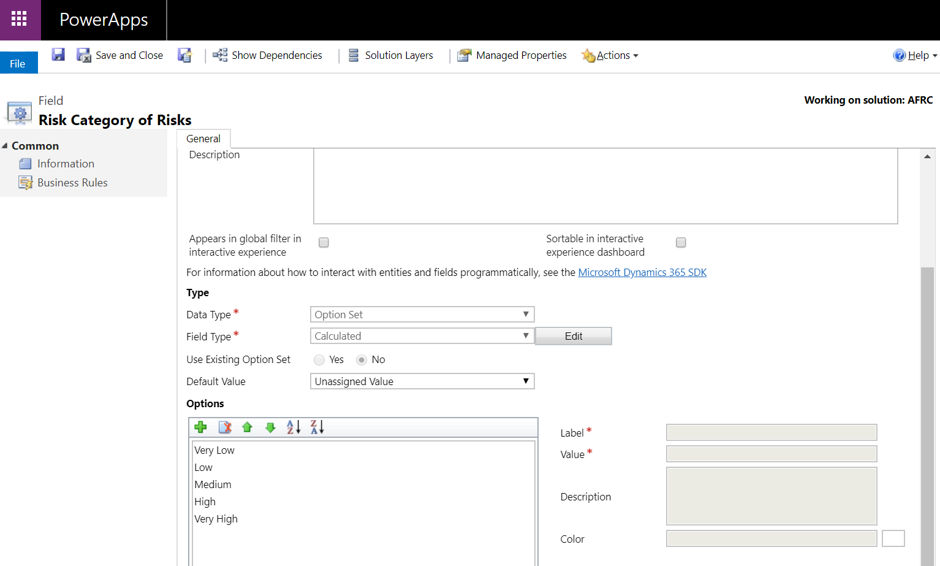
Each value in the option set will have a different value, so make sure you take a note of these as they will be needed for the Javascript later on.
Now you need to create another web resource, but instead of an icon it will be the Javascript that will ensure the icons show alongside the correct values.
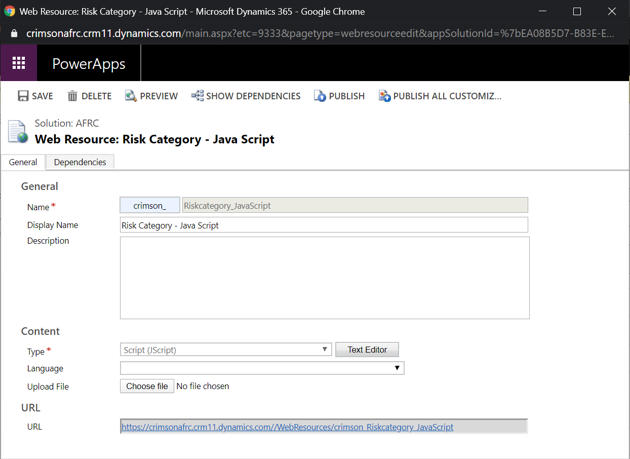
This is similar to the other type of web resource, except the type you select should be Javascript this time around. Once you select text editor you can enter your Javascript. I’ll leave the exact Javascript I used for my solution below. It is OK to use for your own and I’ll point out the bits that are needed to be customized.
function displayIconTooltip(rowData, userLCID) {
var str = JSON.parse(rowData);
var col_data = str.crimson_riskcategory_Value;
var imgName = "";
var tooltip = "{" + col_data +"}";
switch (col_data) {
case 321000000:
imgName = "crimson_blueicon1";
tooltip = "Very Low";
break;
case 321000001:
imgName = "crimson_greenicon1";
tooltip = "Low";
break;
case 321000002:
imgName = "crimson_yellowicon";
tooltip = "Medium";
break;
case 321000003:
imgName = "crimson_orangeicon";
tooltip = "High"
break;
case 321000004:
imgName = "crimson_redicon";
tooltip = "Very High"
break;
}
var resultarray = [imgName, tooltip];
return resultarray;
}
“(var col_data = str.crimson_riskcategory_Value)”
Between str. And _Value is where you need to copy in the appropriate field name that you would like to put the icons into.
case 321000000
This case number is the numeric value that relates to your display value. This is the value I had for “Very Low”.
imgName = "crimson_blueicon1";
This is the icon name. Make sure it is the actual name, not the display name.
tooltip = "Very Low";
This is the value you want to add the specific icon to.
Once you have customized the template above, it is time to save, publish, and insert it into the view.
To do this you need to add the relevant field into the view, then once it's on the view select it to bring up the options. Once you have entered the Java script this is what it should look like.
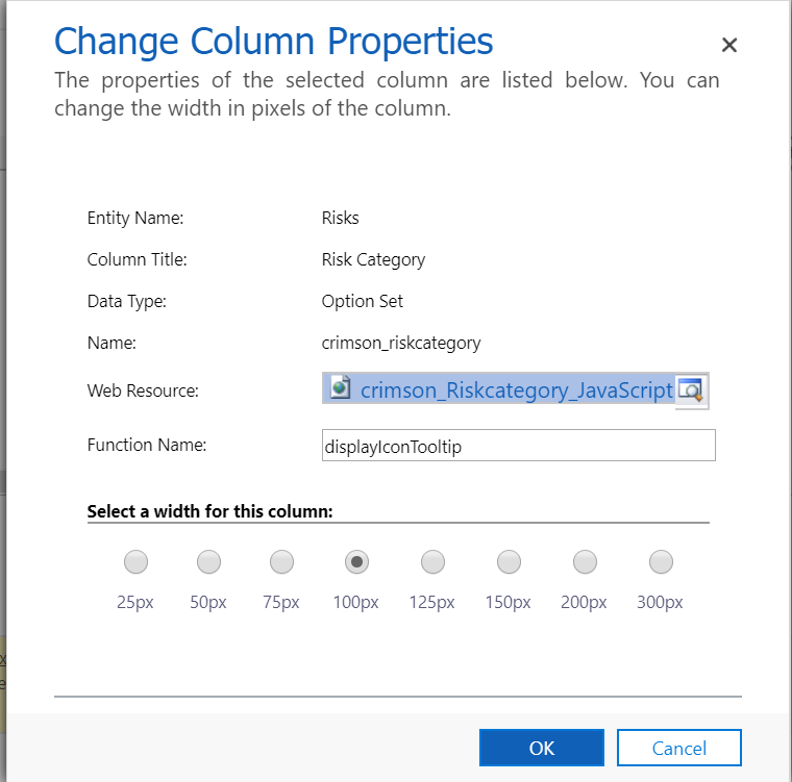
If you have used the template provided, it is key that the function name is exactly as above to ensure that it works when going back into the view. Once that is done, save and publish the view. This is hopefully what it should look like, but with your own customisation.
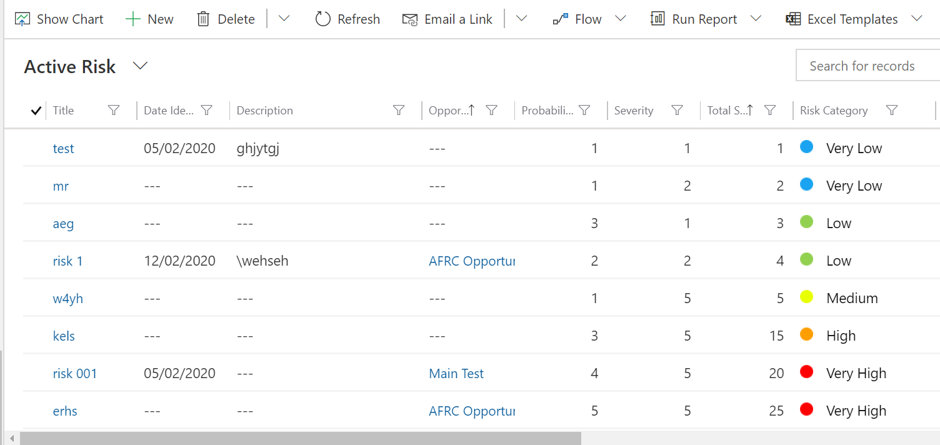
Hopefully you found this guide useful. It certainly took me a while to figure it out - after making a few mistakes along the way - but I’ve tried my best to put enough detail in there to help anyone else through the process for the first time.