Feature Deep Dive: Modern Advanced Find in Dynamics 365
In a recent blog, we discussed the 5 updates you need to be aware of before the general availability of the 2022 Release Wave 2. In that blog, one of the top updates was the changes to Advanced Find.
Almost everyone who regularly accesses Dynamics 365 will be familiar with one specific icon: ![]()
This small filter funnel is an incredibly powerful tool allowing us to query any area of the Dynamics 365 application that our security roles give us access to. Known as Advanced Find, it has seen multiple Dynamics 365 versions come and go.
However, it’s now due for a refresh and Microsoft have given us the “Modern Advanced Find”. Throughout the course of this blog, we will explore the differences between the Modern Advanced Find and the version of the past, specifically focussing on how the once familiar features will now be presented to us.
Advanced Find Update Timeline
Originally announced back in the 2022 Release Wave 1, it will now enabled by default for all users in the upcoming October release.
- For UK instances of Dynamics this will between Friday October 7th to Sunday October 9th.
- For European instances of Dynamics this will be between Friday October 14th to Sunday October 16th.
Advanced Find update walkthrough
How to access the Modern Advanced Find
From October. the way you access Advanced Find will depend on if you have Dataverse search enabled. You will be able to identify if Dataverse search is enabled by looking for the search box at the top of the screen in the middle. If the search box is present, then Dataverse search is enabled.

If Dataverse Search is Enabled...
With Dataverse enabled the Advanced Find icon will be removed entirely.
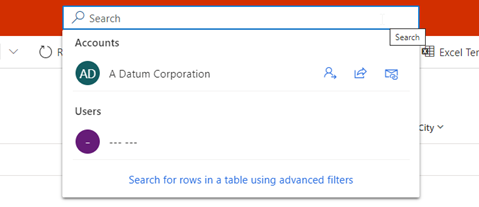
To access Advanced Find, please click on the search box and then click on “Search for rows in a table using advanced filters”.
If Dataverse Search is Not Enabled...
If Dataverse is not enabled, the Advanced Find icon will still be visible on the right of the red bar.
![]()
You can access Advanced Find in the way you are used to, i.e. by clicking on the filter icon.
![]()
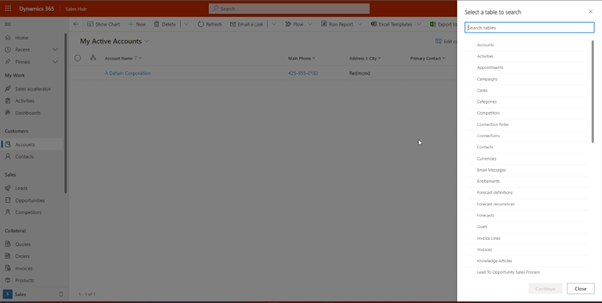
In either case, the next screen you will see is a list of tables (entities) that you can search through. This is reminiscent of the previous interface.
**However, an important point to note is the Modern Advanced Find will only show tables that are included in your app.**
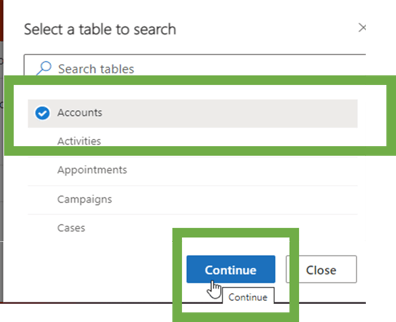
Here you can see I have selected the accounts entity.
The next screen you will be directed to is the filter screen. Here you can define the filter criteria that you wish to apply.
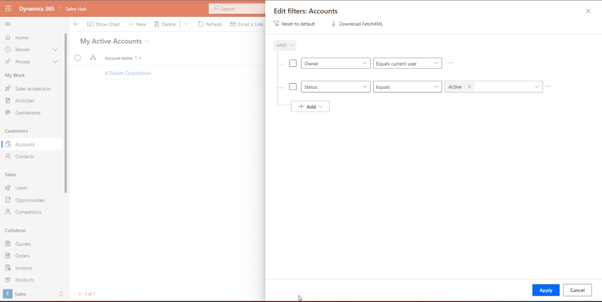
To add a new row simply click on the add button and choose add row.
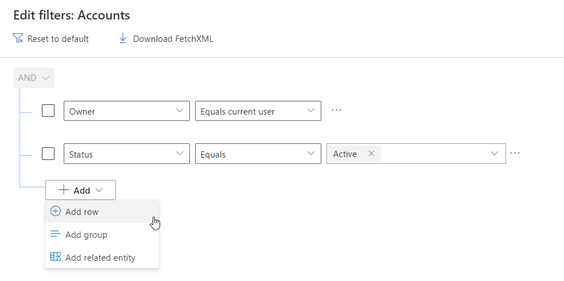
A new row will be added, and you can then select the column that you want to filter on. This is just the same as we used to do in the classic Advanced Find.
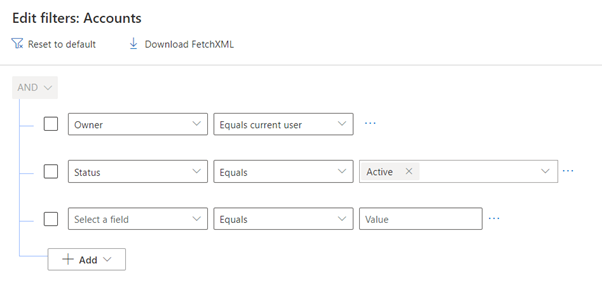
If you want to filter by a related table, you can click add and then choose ‘add related entity’.
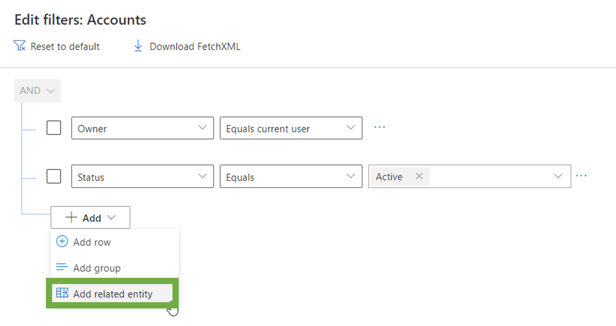
In this case, you can see that I have chosen to add a filter on Cases linked to this account.
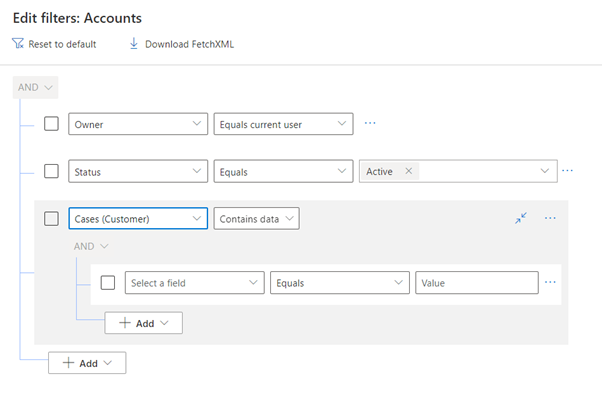
If you want to add in a grouping, click “Add” and then choose "Add Group".
A new group will be added, and you can then add in the items within the group by selecting add and then add row.
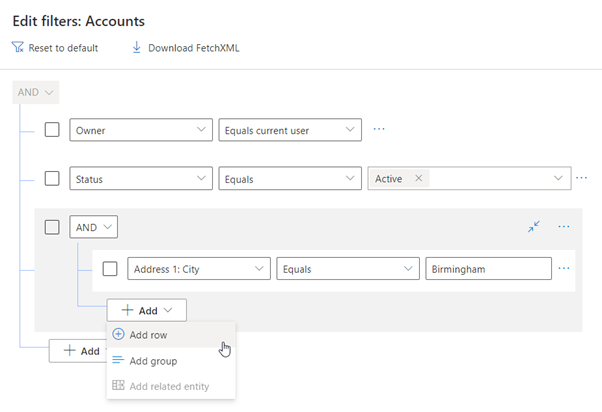
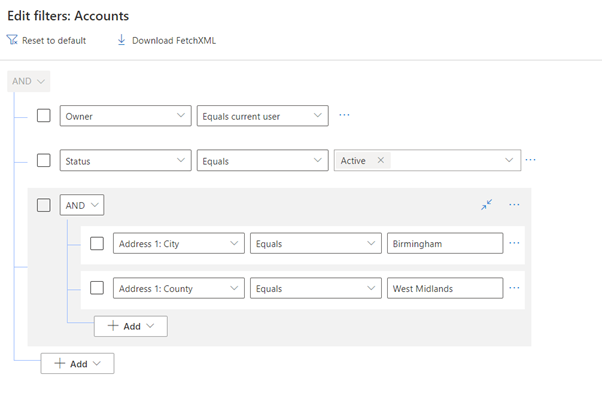
Here you can see we have created a basic grouping.
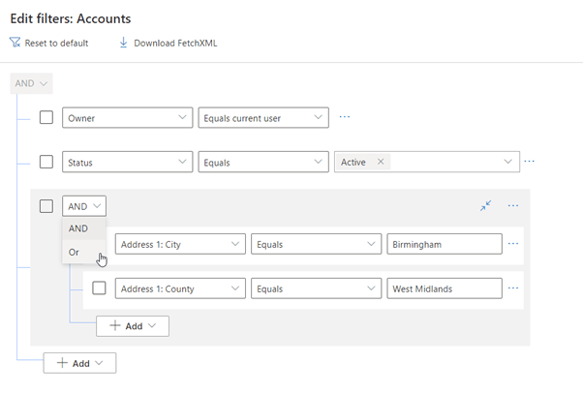
If you want to change the AND to an OR simply click on it and select the appropriate option.
To apply the filter, simply click apply at the bottom of the page.
If you would like to go back to the default filter for the view, you can do this by clicking “Reset to default” button.

We hope this walkthrough has helped you become more familiar with the modern Advanced Find on Dynamics 365. If you're a Crimson customer and you still need some support using the new feature, get in touch with the support team.


